
Hello, gardening enthusiasts! Are you ready to roll up your sleeves, get your hands dirty, and experience the joy of growing your own potatoes? If so, you’ve come to the right place! Potatoes are not just a versatile staple in our kitchens but also a surprisingly rewarding crop to cultivate at home. There’s nothing quite like digging up your own treasure trove of spuds, whether they’re steamed with butter or turned into crispy fries.
In this comprehensive guide, we’ll take you step by step from planting to harvesting and storage, ensuring you achieve a bountiful harvest that will leave both you and your taste buds satisfied. So, let’s dive into the wonderful world of potato cultivation!
Table of Contents
Understanding the Basics of Potato Cultivation
Before you start digging, let’s understand the basics of growing potatoes.
Choosing the Right Varieties
Potatoes come in all shapes, sizes, colors, and textures. With such diversity, it’s essential to choose varieties that best suit your taste and growing conditions. Generally, potatoes are classified into two main types: early potatoes and maincrop potatoes.
- Early varieties, also known as “new potatoes,” are fast-growing wonders that are ready for harvest in as little as 12 weeks. They’re perfect for small spaces and for gardeners eager to enjoy their first crop early in the summer.
- Maincrop varieties, on the other hand, take longer to mature but reward your patience with a more abundant harvest and larger potatoes. They are ideal for baking, roasting, and storing for winter consumption.
Not sure which varieties to choose? Here are some award-winning options to consider: ‘Jazzy,’ ‘Kestrel,’ and ‘Lady Christl.’
Sourcing Quality Seed Potatoes
Now that you’ve chosen your varieties, it’s time to get quality seed potatoes. While you may be tempted to use supermarket potatoes, it’s essential to use certified, virus-free seed potatoes. These seed potatoes are specifically grown to be disease-free and will produce healthy, vigorous plants.
You can purchase seed potatoes from local garden centers, nurseries, or online retailers. Mail-order suppliers offer the widest selection of varieties and allow you to pre-order, as popular choices can sell out quickly.
Preparing Your Growing Site
Potatoes grow best in a sunny spot with at least 6 to 8 hours of direct sunlight daily. They prefer rich, well-drained, and fertile soil. To enhance soil structure and fertility, mix in compost or well-rotted manure before planting. Raised metal garden beds can further improve drainage and aeration, ensuring optimal growth conditions.
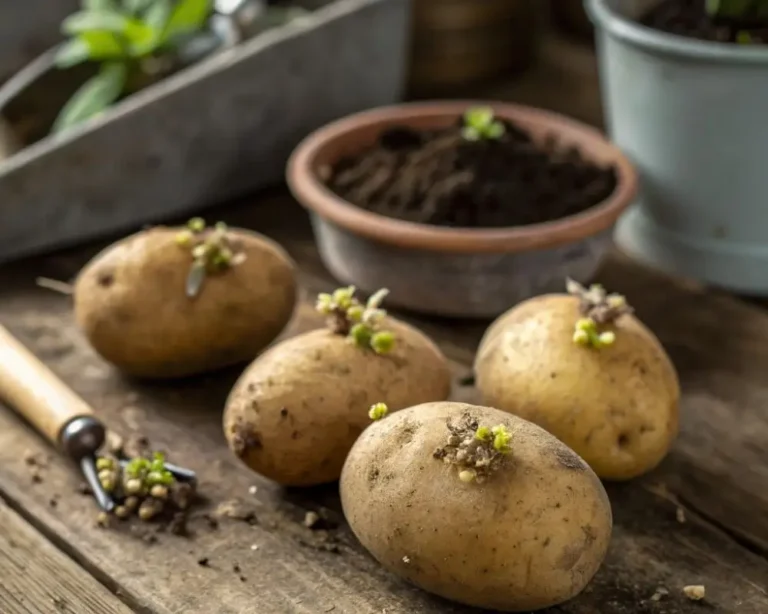
Chitting Potatoes
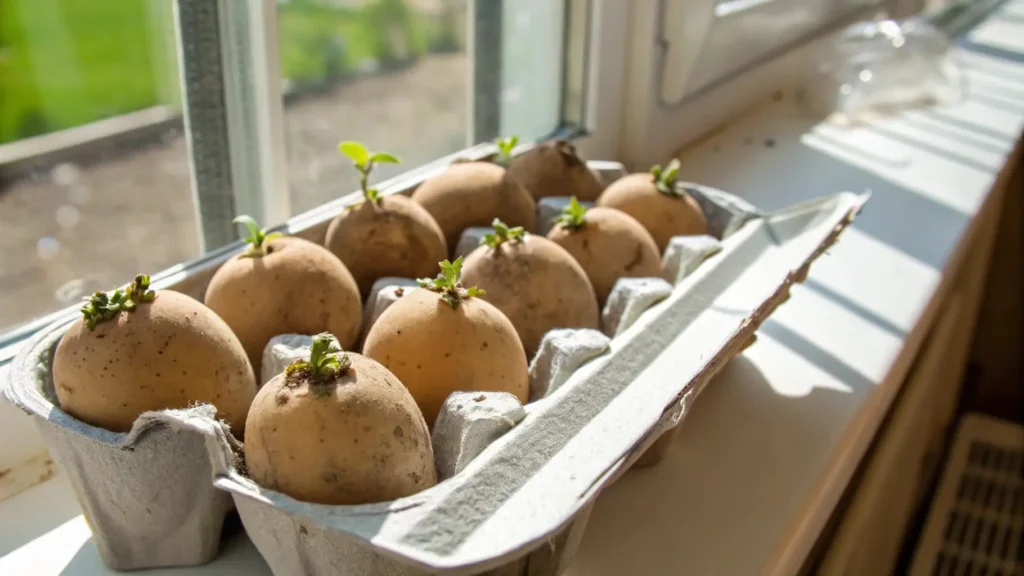
To give your potatoes a head start, especially early varieties, you can chit them before planting. Chitting simply encourages seed potatoes to start sprouting before they go into the ground.
To chit your potatoes, place them in a cool, well-lit area at around 60-70°F (15-21°C). After a few weeks, you’ll notice small green shoots emerging from the potato eyes. This signals that they’re ready for planting.
Planting Your Potatoes
Now that your seed potatoes are chitted and your site is prepared, it’s time to get them in the ground.
Ideal Planting Time
The ideal planting time depends on the variety type and your region. Generally, early varieties are planted from late March to early April, while maincrop varieties are planted from mid to late April. If you live in a colder region, you may need to plant a bit later.
For an extra-early harvest, you can plant chitted early varieties in large containers in an unheated greenhouse in early March. Keep them indoors in a bright location for a harvest by mid-May. For a winter/Christmas harvest, plant pre-chilled seed potatoes in July or early August in a large container in a greenhouse or bright, frost-free spot. Keeping them indoors also protects them from blight.
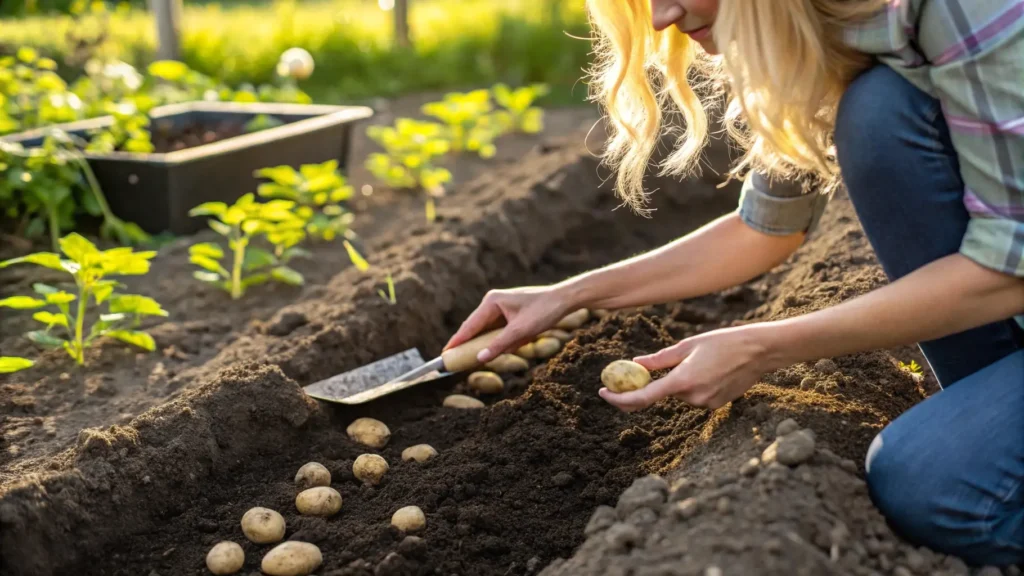
Planting Technique
To plant your potatoes, dig a trench about 6 inches (15 cm) deep. Place the seed potatoes along the base of the trench, with the sprouts facing upwards. Cover with at least 1 inch (2.5 cm) of soil, being careful not to damage the sprouts, and water well. You can also dig individual holes for each seed potato.
Space seed potatoes 12-15 inches (30-38 cm) apart, with rows spaced 2-3 feet (60-90 cm) apart.
If growing in containers, choose appropriately sized containers (at least 12 inches [30 cm] wide and deep) and fill them halfway with peat-free multipurpose compost. Plant one seed potato per 12-inch (30 cm) diameter pot.
Caring for Your Potato Plants
Once your potatoes are planted, it’s essential to provide the necessary care for healthy growth and a plentiful harvest.
Earthing Up
Earthing up involves mounding soil around the stems of potato plants as they grow. This protects the shoots from frost and prevents developing potatoes from being exposed to light, which turns them green and makes them inedible.
When the shoots reach about 9 inches (23 cm) tall, draw soil around them to form a ridge along the row, leaving only the top 4 inches (10 cm) of the plants visible. As the stems grow, repeat the process a few times at intervals of a few weeks. The final ridge height should be 8-12 inches (20-30 cm).
Mulching around the base of your plants with organic mulch options can help retain moisture and suppress weeds
Watering
Potatoes need regular watering, especially during tuber formation. Aim to provide about 1-2 inches (2.5-5 cm) of water per week.
Fertilizing
Maincrop potatoes benefit from a nitrogen-rich fertilizer at the second earthing up. This promotes healthy growth and maximizes yields.
Weed Control
Regular weeding is important in the first month or two after planting. Once potato plants grow strong, they will naturally shade out competing weeds.
Frost Protection
If frost is expected after shoots emerge, protect them with fleece or straw overnight or cover them with soil.
Managing Common Pests and Diseases
Crop Rotation
To prevent soil-borne diseases, plant potatoes in a new location each year and avoid growing them in the same spot for at least 3-4 years.
Pest and Disease Prevention
- Slugs can be controlled with traps, organic slug pellets, or hand-picking.
- Blight, a fungal disease, can be prevented by choosing resistant varieties, ensuring good airflow, and avoiding overhead watering.
Harvesting Your Potatoes
Harvesting potatoes is the truly fun part: carefully lifting your plants to uncover the size of your underground treasure is a joy that never fades, no matter how many years you grow potatoes.
Determining the Right Time to Harvest
The harvesting time depends on the variety. Early varieties are usually ready for harvest in June and July, while storage varieties are harvested from late August to October.For early potatoes, wait until the flowers open or the buds drop. The tubers should be about the size of a hen’s egg. For storage potatoes, start lifting them in late summer for immediate use. You can leave them in the ground until needed, and they will continue to grow, but the longer they stay, the higher the risk of slug damage.
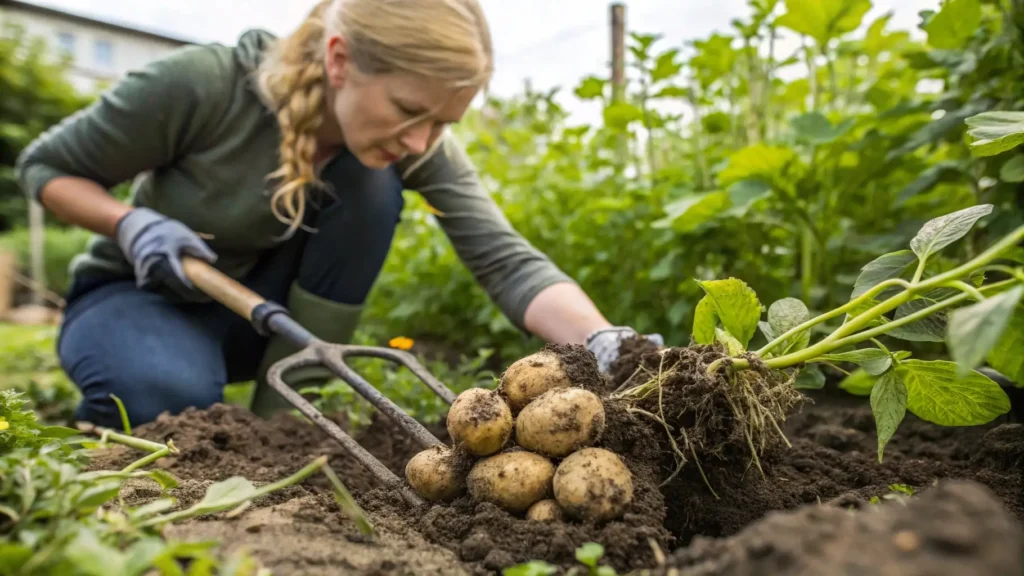
Harvesting Technique
To harvest your potatoes, gently insert your fork at least 30 cm (1 ft) away from the base of the plant to avoid piercing the tubers. Lift the plants and pick up the potatoes by hand. Discard any green potatoes, as they can be toxic.If you only want a few potatoes at a time, try carefully digging beside a plant with a trowel: you should be able to remove a few individual potatoes without disturbing the plant’s roots, allowing it to continue growing.
Harvesting Potatoes Grown in Containers
Container-grown potatoes are really easy to harvest, with no risk of accidental damage: simply tip out the contents and pick your potatoes by hand.
Storing Your Potatoes
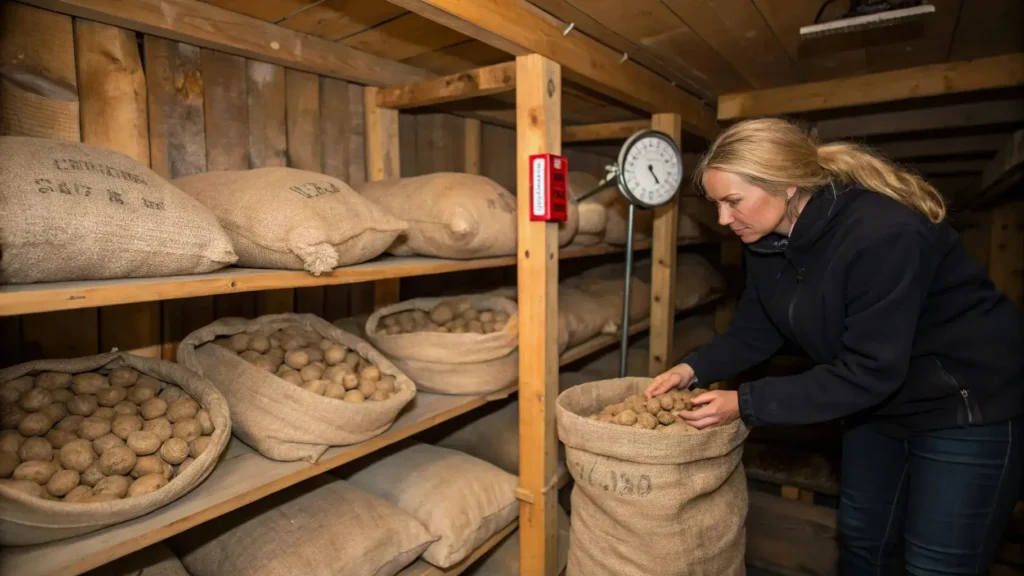
If you have a bountiful harvest of storage potatoes, you may want to store them for later consumption. Here’s how:
Preparing Potatoes for Storage
Choose only perfect, undamaged potatoes for storage. Ensure they are completely dry and gently brush off any remaining soil.
Storage Conditions
Store your potatoes in a dry, cool, and frost-free place, such as a garage. The ideal storage temperature for potatoes is between 2 and 4°C (35 and 40°F). Keep them in paper or burlap sacks or on ventilated trays in the dark to prevent sprouting.
Storage Tips
Regularly check stored potatoes for any signs of rot. Remove and discard any rotten potatoes to prevent them from affecting the rest of the harvest. Aim to use all your potatoes before spring, as they will start sprouting and shriveling.
Exploring Other Growing Methods
If you’re eager to experiment with different potato-growing techniques, several innovative methods can enhance your gardening experience.
Organic potato cultivation
One option is organic potato cultivation, which focuses on using natural fertilizers, compost, and eco-friendly pest control methods to grow healthy, chemical-free potatoes. This approach promotes soil health and sustainability while ensuring a high-quality harvest.
If you’re interested in learning more about organic farming practices, the USDA’s Organic Agriculture Program (NIFA Organic Agriculture) offers detailed resources on methods and regulations in the U.S.
Lasagna gardening
For those interested in specialized growing techniques, methods like lasagna gardening—which involves layering organic materials such as compost, leaves, and straw to create a nutrient-rich planting bed—can be highly effective. Another popular option is potato towers, vertical structures that allow you to grow potatoes in a small space by layering soil and seed potatoes in stacked containers or wire mesh cylinders.
Hydroponic potato growing
If you’re looking for a more high-tech and soil-free approach, hydroponic potato growing offers an exciting alternative. This method involves growing potatoes in nutrient-rich water solutions, which can lead to faster growth and higher yields while reducing soil-related pests and diseases.
Beyond growing methods, potatoes are incredibly versatile in the kitchen. Whether mashed, roasted, fried, or incorporated into hearty dishes, their culinary potential is endless. From classic comfort foods to gourmet creations, potatoes remain a staple ingredient in cuisines worldwide.
Conclusion
So there you have it—a complete guide to mastering potato cultivation! With a bit of planning, effort, and patience, you can harvest a plentiful crop of homegrown potatoes that will leave you and your family satisfied. So what are you waiting for? Get outside, get your hands dirty, and start growing your own potatoes today! Happy gardening!
Frequently Asked Questions
What are seed potatoes?
Seed potatoes are specially grown tubers used for planting new potato crops. They are free from diseases and selected for high-quality sprouting.
Can I plant store-bought potatoes as seed potatoes?
While possible, it is not recommended. Store-bought potatoes may be treated with sprout inhibitors and can carry diseases that affect crop yield. Certified seed potatoes ensure better results.
Do seed potatoes need to be sprouted before planting?
Yes, pre-sprouting (chitting) seed potatoes by placing them in a bright, cool location for a few weeks before planting can speed up growth and improve yields.
How should I cut and prepare seed potatoes for planting?
Large seed potatoes can be cut into pieces, each containing at least one or two eyes. Allow cut pieces to dry for 24-48 hours before planting to prevent rotting.
How deep and far apart should I plant seed potatoes?
Plant seed potatoes about 4 inches (10 cm) deep and space them 12 inches (30 cm) apart in rows. Cover them with soil and hill up as they grow to encourage higher yields.
1 thought on “Seed Potatoes: Harvest & Storage Tips for a Big Yield!”